How to Make Your Own Photo Recipe Book with instax™
There's something brilliant about flipping through a recipe book where every dish stares back at you from an instant photo. Not a glossy magazine shot — your actual bake, in your actual kitchen.
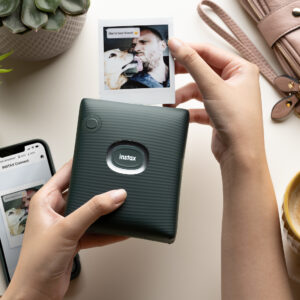
That's the magic of building your own recipe collection with the instax mini 12™. You're creating a visual diary of what you've made and perfected. Every photo becomes proof that you conquered that time-consuming sourdough or nailed gran's Victoria sponge.
Your instax mini 12™ turns cooking into something you can hold and share. Unlike that recipe saved on your phone, this one lives on your kitchen shelf, ready to use whenever you feel like it.
Why make a DIY recipe book with photos?
Recipe apps are convenient, but there's nothing like having your own edible archive you can touch and annotate. This way, you can actually remember what worked. That tweak to the chilli recipe that made everyone ask for seconds? Captured and documented.
It becomes genuinely yours. Scribbled notes, crossed-out measurements — this is cooking as it really happens. Sharing recipes becomes more meaningful too. Print the photo and pair it with handwritten notes on a separate card or page. It's an instant gift that shows actual thoughtfulness. Beyond the practicalities, you're building a collection of memories alongside flavours. You'll remember who you fed, what occasions called for certain dishes, and why that particular Tuesday absolutely needed chocolate cake.
What you'll need
- You instax mini 12™ – This compact camera is perfect for kitchen photography thanks to its automatic exposure adjustment that adapts to different lighting conditions. The built-in selfie mode and close-up lens adapter make it ridiculously easy to capture your dishes from various angles. The instax mini 12™ offers five colour options to match your kitchen aesthetic, and its simple one-twist operation means you can snap photos quickly, even with floury hands. The automatic flash helps ensure your photos turn out well, even in dimly lit kitchens.
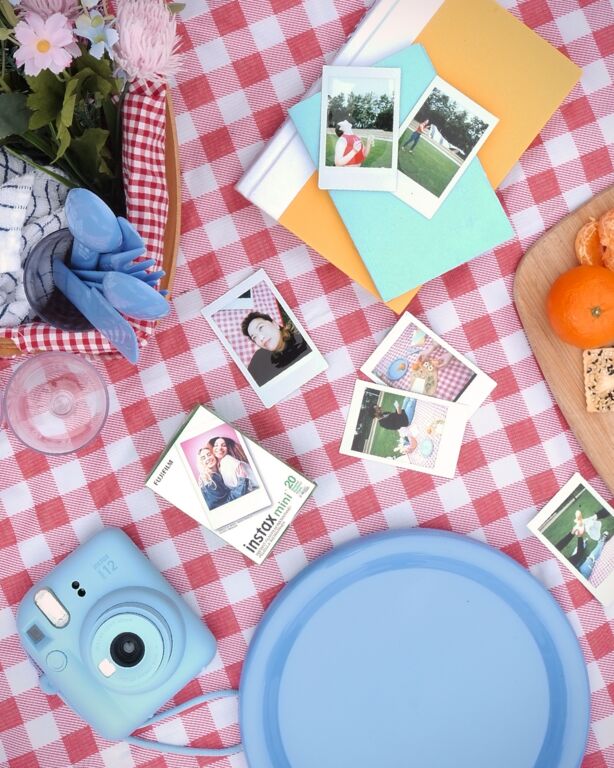
- instax™ mini film – Stock up on plenty of film packs. You'll want to capture multiple shots of your best dishes, plus document the cooking process. The instax™ mini film format produces credit card-sized prints (54mm x 86mm) that develop in minutes. Consider trying different film options like the standard glossy finish for vibrant colours, or explore special edition films if you want to add creative flair to certain recipes.
- A binder or album – Choose an A4 or A3 scrapbook that's sturdy enough to survive kitchen chaos. You'll need space not just for the photos, but for handwritten recipes, ingredient lists, and notes. Look for something with thick pages that can handle glue, tape, and the occasional spill. Ring binders work brilliantly as you can rearrange pages and add sections as your collection grows.
- Craft supplies – Decorative tape, coloured pens, labels.
- Your recipes – Family favourites, internet finds, complete experiments, happy accidents. If you've cooked it and loved it, it belongs here.
Planning your recipe book
Before you start snapping photos and sticking them in, take a moment to think about how you actually cook and use recipes. This planning stage will help you create a recipe book that's genuinely useful rather than just decorative. Consider your cooking habits, how often you entertain, and which recipes you turn to most frequently. The way you organise your book should reflect your real kitchen life, making it easy to find exactly what you need when you need it.
By meal type – Create clear sections for different times of day: breakfast spreads, quick lunches, proper dinners, and midnight snacks. This approach works well if you tend to think "what should I make for dinner tonight?"
By ingredient – Brilliant for reducing food waste. Group recipes showing everything you can do with eggs, or different ways to use up leftover chicken. Particularly useful when you've got seasonal produce like tomatoes or courgettes that need using up.
By season – Summer salads featuring fresh tomatoes, autumn roasts with root vegetables, winter warmers like hearty stews, and spring dishes celebrating fresh herbs. This helps you cook with ingredients at their peak.
By occasion – Keep weeknight rush jobs separate from Sunday projects and impress-the-guests dishes. This makes it quick to pull together a dinner party menu or find something fast after work.
Family recipes vs. experiments – Decide whether to keep grandmother's originals in their own protected section or mix everything together. There's something special about preserving handed-down recipes separately.
The new recipe section – Dedicate space at the back for recipes you're currently testing. Once perfected, they graduate to the main collection with a beautifully photographed final version.
How to photograph and print your dishes
Good photos make you want to cook the recipe again. Here's how to capture your food using the instax mini 12™
Chase natural light – Photograph near a window during daytime for the best results. Natural light brings out the true colours of your food and creates appealing shadows that add depth. Artificial kitchen lighting can cast unflattering yellow or blue tones that make your dishes look unappetising.
Mind the focus distance – The instax mini 12™ works best when you're at the right distance from your subject. Get close enough to fill the frame with your dish, but leave some breathing room around the edges. The close-up lens adapter (included with the camera) is perfect for detailed shots of garnishes, textures, or ingredients.
Angles matter – Different dishes photograph best from different perspectives. Shoot from directly above for flat dishes like pizza, tarts, or decorated biscuits to show off patterns and arrangements. Use a slight overhead angle (about 45 degrees) for anything with height like layer cakes, burgers, or stacked pancakes. Go eye-level for impressive layer cakes or towering burgers where you want to emphasise the height and show off those delicious cross-sections.
Style simply – Add a wooden spoon beside the dish, scatter some fresh ingredients around the plate, or show a hand reaching in with a fork. Make it look like you're actually cooking, not staging a magazine shoot. A simple cloth napkin or rustic board as a backdrop can enhance your photos without overwhelming the food.
Capture the process – Don't just photograph the finished dish. Document the journey by snapping photos of the dough rising, vegetables mid-chop, sauce reducing in the pan, or batter being mixed. These process shots tell the story of the recipe and can be incredibly helpful when you're trying to remember what the mixture should look like at each stage.
Using your instax mini 12™ – Turn on the camera by twisting the lens. Frame your shot through the viewfinder and press the shutter button. The camera handles exposure automatically, adjusting to your lighting conditions. Your photo emerges from the top of the camera in seconds. Don't shake it — just lay it flat and let it develop naturally over the next few minutes. The image will gradually appear, with full development taking about 90 seconds.
Two recipes to start your collection
Starting a recipe book can feel overwhelming, so begin with just a couple of dishes. These two recipes are deliberately chosen to be forgiving, delicious, and photogenic. They're the kind of recipes that work reliably, taste wonderful, and look beautiful in instant photos. Once you've documented these successfully, you'll have the confidence to photograph and record your entire repertoire.
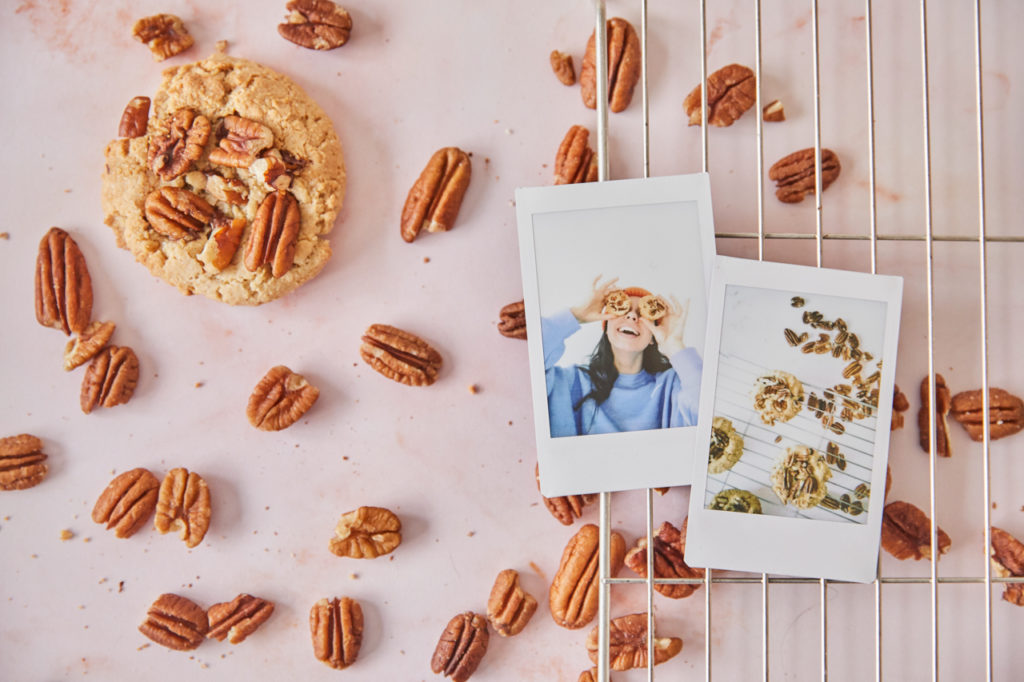
1. Pecan Chocolate Chip Cookies (Makes 6 large cookies)
These vegan cookies are ridiculously easy and best eaten when they're still warm and gooey.
Ingredients:
- 125g plain flour
- 1/2 tsp baking powder
- 50g caster sugar
- 50g brown sugar
- 60ml water
- 1/4 tbsp melted coconut oil (approx. 10ml)
- 1/2 tsp vanilla extract
- Pinch of salt
- 170g vegan chocolate chips
- 125g pecans
Method:
- Mix flour, baking powder, salt, and chocolate chips in a bowl
- Whisk sugars, oil, and water in a separate bowl until combined
- Add flour mixture to sugar mixture and stir until dough forms
- Chill dough in the freezer for 30 minutes. Preheat oven to 180°C/Gas 4
- Scoop dough into mounds, place 2 inches apart on baking tray
- Bake for 12-15 minutes
Capture it: Photograph while still warm, when the chocolate chips are glossy and slightly melted. Natural light from the side shows texture beautifully.
2. Marble Chocolate and Banana Bread
Banana bread is proper comfort food and a brilliant way to use overripe bananas. The browner, the better.
Ingredients:
- 75g melted butter
- 225g mashed banana (about 3 medium bananas)
- 1 large egg
- 190g plain flour
- 1 tsp baking powder
- 50g granulated sugar
- 100g brown sugar
- 1/4 tbsp cocoa powder (approx. 5g)
- 30ml milk
- 1 tsp vanilla extract
- Pinch of salt
Method:
- Whisk banana and melted butter together
- Beat in sugars, egg, and vanilla
- Add flour, baking powder, and salt. Whisk until fully combined
- Take 2/3 cup of batter and place in a separate bowl. Add milk and cocoa powder, whisk
- Grease a loaf pan and preheat oven to 180°C/Gas 4
- Add 2 large spoonfuls of plain batter to pan, then 1 spoonful of chocolate. Continue pattern
- Bake for 40-45 minutes. Allow to cool
Capture it: The marble effect photographs gorgeously when sliced. Shoot from above to show the swirl pattern, or from the side to capture height.
Putting your pages together
Photo placement and layout:
- Top centre positioning – This classic approach draws the eye immediately to the dish. It works particularly well for straightforward recipes that don't require extensive notes.
- Side placement – Position your photo to the left or right to leave plenty of room for longer ingredient lists or detailed methods with multiple steps.
- Multiple photos per spread – Some recipes deserve several photos showing different stages. Use this for impressive dishes where the process itself is worth documenting.
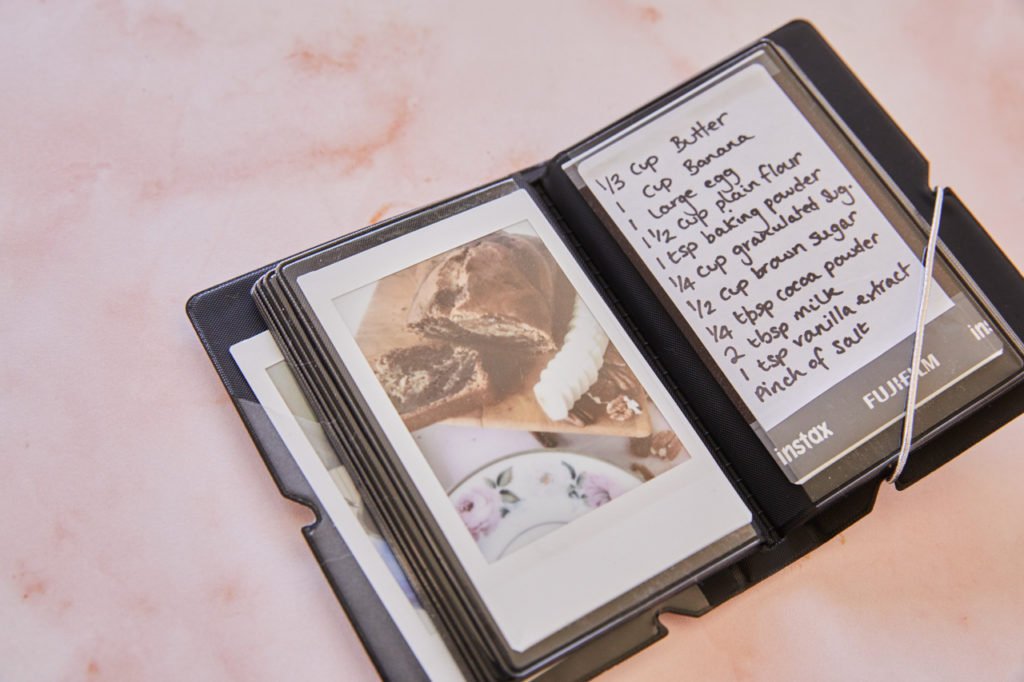
Write down the essentials: ingredients, method, servings, timing, and temperatures. Add context too—note where the recipe came from, who shared it, and any stories behind it. These personal details become treasured parts of your culinary history.
Leave space for adjustments and successful swaps. You'll discover tweaks like "always add extra garlic now" or "maple syrup works better than honey." Document these directly on the page. Consider using protective sleeves to keep your photos and writing safe from kitchen spills.
Creative touches to make it uniquely yours
Personalising your recipe book transforms it from a simple collection into something that truly reflects your cooking style. Small creative touches make the book more enjoyable to use and more meaningful to look back through.
Visual organization:
- Colour coding – Use different washi tape colours to distinguish cuisine types at a glance. Red for Italian, green for salads, yellow for baking. This helps you flip quickly to the section you need.
- Rating systems – Stars for overall success, hearts for family favourites, chilli peppers for heat levels. Add small icons to indicate quick recipes, advance prep needed, or special dietary requirements.
- Document failures too – Include disaster photos with honest notes: "Overbaked by 10 minutes — learn from this!" These prevent repeat mistakes and create brilliant before-and-after comparisons.
Note ingredient swaps that worked well: "Used maple syrup instead of honey — better" or "Greek yoghurt works perfectly in place of sour cream." Over time, these annotations transform basic recipes into your own perfected versions.
Making decorative photo borders:
Frame your instax™ prints by mounting them on patterned scrapbooking paper. Use floral patterns for spring recipes or geometric designs for modern dishes. Layer different coloured paper for depth, or use craft punches to add decorative corners. Choose backing paper colours that complement rather than compete with your food photography.
Leave collaboration pages where friends and family can add their own recipes when they visit. You'll gradually collect recipes in different handwriting styles with personal notes from people you love.
Gift and sharing ideas
Your photo recipe book opens up wonderful opportunities for meaningful gift-giving and sharing culinary knowledge.
Recipe cards as gifts:
Photograph your dish with the instax mini 12™, then write the recipe on a separate card. This is #GiveINSTAX™ in action—giving physical photos that carry memories and practical information. Package single recipe cards in envelopes as hostess gifts, or gather three to five related recipes (like a complete dinner menu) and tie them together with a ribbon.
Starter collections:
Document 10-15 essential recipes in a small scrapbook for someone moving into their first flat or heading to university. Include basics like pasta sauce, roast chicken, foolproof rice, and a few sweet treats. Add your personal notes about why you chose each recipe—these annotations make the gift invaluable.
Preserving family recipes:
Use your instax mini 12™ to document heritage dishes. Photograph older relatives making their signature dishes—capture their hands working, the process, and the finished dish. Record the recipe in their exact words, including their techniques and stories. These documented family recipes become increasingly precious and can be copied for other family members.
Level up your baking with the instax mini 12™
The beauty of instant photos is their immediacy and physicality. What you see is what you get: authentic food from real kitchens, captured honestly without digital manipulation. Your instax mini 12™ helps you build something that's part reference guide, part memory book, part kitchen companion.
Start with one recipe. Photograph it, print it, stick it on a page. Before long, you'll have a collection that's entirely yours.